If you’ve ever been mid-shoot on a gorgeous outdoor location, watching the sun drop on your golden hour, only to realize you’re tethered to a wall outlet fifty feet away you already know why portable power matters. For videographers and photographers running LED lights like the Godox VL150 or the Aputure 120d, a good V-mount battery isn’t a luxury. It’s what separates a controlled, professional setup from a scramble.
This guide walks you through how a v mount battery for lights work, what power specs to look for, and how to mount them cleanly to your light stand without turning your kit into a cable nightmare.
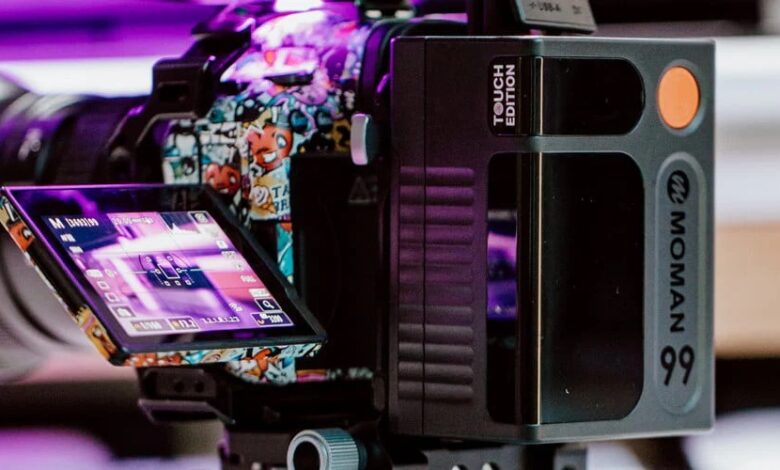
Source: Moman
What Is a V-Mount Battery for Lights and Why use it?
A V mount battery for lights also called a V-lock battery is a high-capacity lithium-ion power source originally designed for professional broadcast cameras. The name comes from the V-shaped locking groove on the battery that clicks securely into a matching plate on your camera, light, or accessory. Once Sony introduced the standard, it quickly became universal across the industry.
What makes V-mounts so appealing for lighting setups is their combination of high voltage (typically 14.4V nominal), large capacity, and multiple output ports. A single battery can simultaneously power your LED light through a D-Tap cable, charge your phone via USB-C, and run a field monitor through a secondary output all without a power strip in sight.
For run-and-gun shooting, event videography, and any outdoor work, V-mount batteries simply free you from the wall. And that freedom is worth a lot.
Powering the Godox VL150 with a V-Mount Battery
The Godox VL150 is a popular choice among indie filmmakers and studio shooters alike. It’s a 150W daylight-balanced LED with a Bowens mount, Bluetooth app control, and crucially a built-in V-mount plate that accepts batteries directly on the light’s body. You don’t even need an adapter cable in most setups; the battery clips right on.
At full power, the VL150 draws 150 watts. Running on a 14.4V battery, that translates to roughly 10 amps of continuous draw. This is why battery output current matters just as much as capacity: a battery that can only deliver 6–8 amps will struggle or shut off under the VL150’s load.
For the Godox VL150 specifically, a battery with at least 150–190Wh capacity is recommended for comfortable, extended shooting. A 99Wh battery can technically run the light, but at reduced brightness or for shorter durations. If you’re doing a full-day outdoor shoot, two 99Wh batteries swapped in rotation, or a single 140–190Wh unit, will serve you better.
A key spec to confirm: your battery needs to sustain a continuous output of at least 10–12 amps. Many compact V-mounts, including the Moman Power 99 Touch, are rated for up to 12–15A of continuous draw, which covers the VL150 comfortably even at 100% output.
Aputure 120d V-Mount Battery Requirements
The Aputure 120d is a beloved COB light in the filmmaking community with clean output, excellent color rendition, and Bowens mount versatility. But powering it via V-mount takes a little more thought than slapping on any 99Wh brick.
The original Aputure 120d draws around 135W at full power, while the 120d II draws closer to 180W in some configurations. At 14.4V, 180 watts means a current draw of around 12–13 amps pushing the upper limit of many compact batteries.
The key lesson here: watch the amps, not just the watt-hours. A battery rated at 11Ah or below may work fine at lower brightness but could shut off unexpectedly if the light draws more current than the battery can sustain. Several filmmakers in online communities have reported the 120d cutting out mid-shoot when paired with underpowered batteries — a frustrating experience you can avoid by checking the continuous discharge rating before purchasing.
Recommended capacity for the Aputure 120d: 130–150Wh minimum for one to two hours of runtime at moderate brightness. For longer shoots or full-power use, step up to 190Wh or higher. The amperage rating should be 12A or more to avoid cutoffs.
If you want a flexible option that handles the 120d and other lights in your kit, choose V-mount battery collection offers models ranging from compact 99Wh units to larger-capacity options that cover high-drain fixtures without breaking a sweat.
Choosing a V-Mount Battery for LED Lights: What to Look For
Shopping for a V-mount battery for your lighting setup comes down to four practical factors:
1. Capacity (Wh) This determines how long your light runs. Use this simple formula as a rough guide:
Runtime (hours) = Battery Wh ÷ Light Wattage × 0.85
The 0.85 accounts for conversion efficiency losses. So a 99Wh battery powering a 150W light gives you approximately 0.56 hours about 33 minutes at full blast. For a 100W light, you’re looking at closer to 50 minutes. Knowing this upfront saves a lot of frustration on set.
2. Continuous Amperage Output As discussed above, your battery must be able to deliver enough amps to match your light’s draw. For lights in the 100–150W range, look for 12–15A continuous output.
3. Output Ports D-Tap is the standard interface for connecting V-mount batteries to LED lights via a power cable. Make sure your battery has at least one D-Tap output if you’re running lights that don’t have a built-in V-mount plate (like the Aputure 120d’s separate ballast box). Bonus points for USB-C PD output if you also want to charge cameras, laptops, or monitors from the same battery.
4. Display and Battery Management On a busy set, knowing how much charge remains at a glance is more useful than it sounds. A V-mount battery with display shows both remaining percentage and estimated runtime removing the guesswork and helping you plan battery swaps before they become emergencies.
How to Mount V-Mount Batteries to a Light Stand
One of the more practical challenges when using V-mount batteries for LED lights is cable management. Even when the battery doesn’t clip directly onto the light, you still need it close enough to the light that the D-Tap cable can reach comfortably without dragging across the floor or creating a trip hazard.
The cleanest solution is a V-mount clamp or battery holder designed to attach to a light stand pole. Here’s how a typical setup works:
- Choose your clamp. A spring-loaded jaw clamp grabs onto your light stand pole typically any tube between 1 and 1.65 inches in diameter. These are compact, affordable, and take seconds to install.
- Position it just below the light. Slide the clamp onto the stand pole and tighten it at a height that keeps the battery within cable reach of the light’s power input, ideally at chest height or higher to keep the cable off the ground.
- Lock the battery in. Slide the V-mount battery into the clamp’s V-lock plate until it clicks. A secure click means the battery is fully seated. Never rely on a battery that feels loose the V-lock should hold firm even if the stand is bumped.
- Connect your D-Tap cable. Run it from the battery to your light’s DC input port. Keep excess cable length managed with velcro ties to prevent snagging.
- Power up in order. Turn on the battery first, confirm it’s reading correctly on the display, then power on the light. This sequence helps the battery’s BMS properly initialize before taking on the full load.
For setups where the battery clips directly onto the light body (like the Godox VL150), the process is even simpler with no stand clamp needed. Just attach the battery to the light’s V-mount plate, connect any required cable if using the ballast box, and you’re good to go.
Final Thoughts
V-mount batteries have genuinely changed what’s possible on a one-person or small-crew shoot. The ability to take a 150W light completely off-grid to a rooftop, a forest trail, or a moving vehicle and shoot for an hour or more on a single battery opens up locations and looks that simply weren’t practical with AC power alone.
For most LED lights in the 100–150W range like the Godox VL150 or Aputure 120d, a well-chosen 99–150Wh battery with strong amperage output covers the majority of real-world shooting scenarios. If you’re doing longer productions or powering higher-wattage fixtures, step up to 190Wh or beyond.
Whatever you choose, check the watt-hours for runtime, confirm the continuous amperage for compatibility, and pick up a clamp or holder to keep your stand setup clean and professional. Your future self, the one not tripping over cables in the dark will thank you.