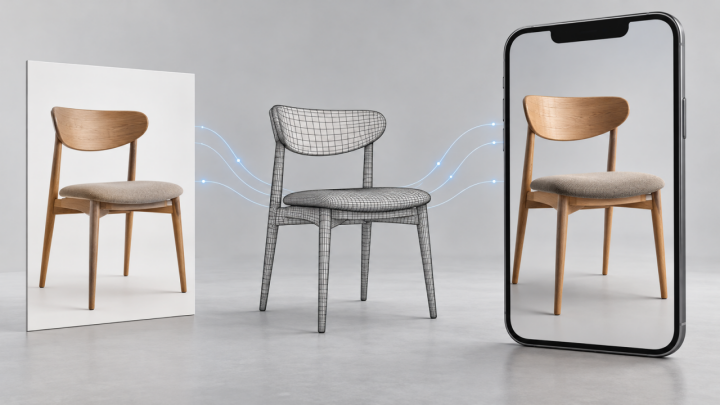
A dining chair can look convincing in a product photograph while leaving a shopper unsure about its curved back or the space beneath its seat. An interactive model gives that shopper another way to inspect the product. For furniture retailers exploring image to 3D, N4D provides a starting point for generating geometry from reference imagery. The commercial task is to turn that first output into a faithful, responsive representation of the item being sold.
That task needs a repeatable review process. A generated chair may have a plausible silhouette while its rear legs differ from the physical product. Its upholstery might appear glossy under a different light. Retail teams can address these issues through four checks covering reference images, geometry, materials and storefront delivery. This workflow treats generation as one stage in catalogue production and gives each subsequent decision a clear owner.
Start with a product shoppers need to inspect
Choose a pilot item whose shape raises useful buying questions. An upholstered dining chair works well as a working example because customers may want to inspect the backrest, frame and seat depth. Use an existing product with reliable measurements and accessible photographs. This makes it possible to judge the output against evidence rather than against the attractiveness of a render.
Define the viewer’s purpose before producing the asset. A rotating model can reveal the shape of the backrest; an augmented reality preview can help customers consider placement when the model has verified scale. Neither feature replaces the dimensions, material description or photographs on the product page. Decide which customer question the additional view should answer, then use that question to guide the review.
Check 1 Prepare references that describe the actual chair
Begin with a clear photograph showing the whole product against an uncluttered background. Keep the legs visible and avoid cropping the backrest. Strong perspective distortion can make a chair’s front legs appear disproportionately large, while deep shadows may hide the connection between the seat and frame. Select references that make those construction details readable.
Gather supplementary views for review, even when starting generation from a single image. Rear and side photographs help the reviewer identify details that the main shot cannot reveal. An unseen surface remains an inference until it is checked. If there is no rear reference, ask the supplier for one before approving a model that customers can rotate through every angle.
The N4D generation interface currently accepts PNG, JPG, JPEG and WebP images up to 20 MB. It also exposes texture and PBR controls, mesh quality settings and triangle or quad topology options. These controls let an operator choose how to begin an asset, but a selected setting does not establish product accuracy. Record the source image and generation settings so the team can reproduce or revise the work.
For the chair pilot, keep a small reference folder containing the approved photographs, product identifier and measured dimensions. Flag any detail that remains uncertain, such as the underside of the seat. This gives the reviewer a defined list of questions to resolve.
Check 2 Approve shape and scale before surface detail
Inspect the generated model without relying on its textures. A plain shaded view makes it easier to spot an uneven backrest, fused legs or an opening that has been filled. Rotate the chair through the same angles covered by the supplier photographs. Check the connections beneath the seat and the spacing between the rear legs, where a convincing front view can conceal errors.
Approve the silhouette before refining the finish. If the chair has the wrong backrest shape, a better fabric texture will not correct it. Decide whether an error can be repaired in a modelling tool or whether a different reference image is likely to produce a more useful starting point. Record the reason for rejection so the next attempt addresses a specific issue.
Set the model’s scale from the product specification and verify more than one measurement. Matching overall height alone can leave the seat too wide or the frame too deep. Check overall width and depth, then compare seat height and other dimensions that matter to the buying decision. A single photograph does not provide a dependable basis for millimetre accuracy.
For an AR preview, confirm the exported asset’s units and its contact with the floor. A chair that appears to float or has been scaled incorrectly undermines the placement exercise. Keep the measured product dimensions visible on the page so customers can assess clearance around a table or in a smaller room.
Check 3 Make the materials behave under changing light
Furniture surfaces need their own review. Oak, woven upholstery and a coated metal frame respond differently to illumination. A material that looks acceptable in the generator’s preview may look different in the storefront viewer, where the lighting environment and display settings can change.
Base colour should describe the surface rather than contain a fixed studio shadow. A dark patch copied from the photograph into the colour texture can remain visible when the viewer lights the model from another direction. Examine the material under more than one lighting setup and correct obvious lighting contamination before approving it.
Review wood grain direction and scale, fabric weave and the roughness that controls surface reflections. Use the actual product photographs as references. Avoid adding detail simply because it makes the model look more expensive. A polished surface on a matte chair is a merchandising error.
Keep finish variants attached to the correct product identifier. Reusing approved geometry for a different upholstery colour can reduce repeated work when the physical construction is identical. A wider seat, different frame or changed stitching pattern needs a separate review. Confirm each variant against the item that will be delivered.
Check 4 Test the asset in the customer’s browsing conditions
Prepare a delivery copy after the model has passed visual review. Preserve the editable master so later optimisation does not become the only surviving version. For the web copy, remove hidden geometry where appropriate, reduce unnecessary surface complexity and choose texture sizes that hold up at the intended viewing distance.
Geometry compression is a separate decision from mesh simplification. Tools supporting Draco or Meshopt can reduce transfer size when the destination viewer supports the relevant decoder. The glTF Transform documentation explains that compression alone does not directly improve frame rate; reducing geometry or draw calls addresses rendering workload. Check decoder support and test the exported file in the actual viewer before adopting a compression setting.
For Shopify stores, the platform’s product media guidance lists GLB and USDZ as accepted 3D model formats and requires a theme that supports the media. Check the store’s theme and publishing workflow before commissioning a large batch of assets. A successful local preview does not confirm that the live product page will display the model correctly.
Run the chair through a short acceptance test:
1. Open the product page on a representative mobile connection and observe how soon the model becomes usable.
2. Rotate and zoom on a midrange phone, checking for stutter, missing textures and awkward touch controls.
3. Open the available AR experience on supported devices and verify scale, floor placement and material appearance.
4. Confirm that product photographs remain available when the interactive experience cannot load.
Measure time to a usable view alongside visual quality. Review the complete product page, including its images and other scripts, because the model shares the customer’s device and connection with the rest of the store.
Give every approved asset a traceable handover
A small catalogue team can keep a simple asset record rather than introducing a complex system. Include the product identifier, reference image version, confirmed dimensions, reviewer, delivery filename and approval date. Add notes on unresolved details and the devices used for testing. This makes later supplier changes easier to reconcile with the published model.
Teams learning 3D workflows can also explore the DIY3D maker community as a source of community models and creative references. Such resources serve a different purpose from an approved retail asset: a customer-facing chair must match the retailer’s own product evidence. Check individual permissions before reusing any community material, and keep experiments separate from the catalogue’s approved files.
Judge the pilot by its usable output
Track the effort required to obtain an approved asset, including reference preparation, review, corrections and storefront testing. Generation time is only one component. A pilot that produces an attractive model but requires extensive repair reveals a reference or workflow problem worth addressing before expansion.
Once the chair is published, monitor whether customers use the viewer and whether questions about shape or placement change. Compare results with a suitable baseline and account for traffic, promotions and other page edits. Treat any commercial improvement as something to measure in that store rather than a guaranteed result of adding 3D.
For furniture retailers, N4D can provide the starting geometry for a more informative product presentation. A dependable catalogue workflow then connects that output to verified photographs, measured dimensions, reviewed materials and mobile testing. Starting with one well-documented chair gives the team a practical basis for deciding which products to digitise next and how much work each approved asset will require.